Table of Contents
#4 Creating Secrets for My Lambda End Point
Last time we create the core of our Rest API Lambda, we now want to connect to our RDS MySQL database. However we don’t want to embed the connection details, passwords, port information inside our code for security purposes. To get around this problem AWS has a service call Secrets Management, and that’s what were going to cover in this Blog.
AWS Secrets Manager Create New Secret
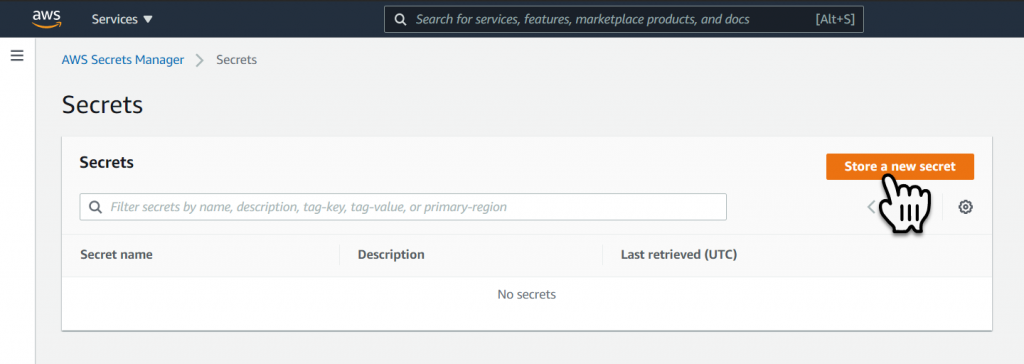
To store a new AWS Secret, login to the AWS Services Console and navigate to the Secrets Manager Dashboard, then select Store a New Secret.
The first step is to select the Secret Type, since we are going to connect to our RDS MySQL Database we will select ‘Credentials for RDS Database’ for the secret type. Within the RDS MySQL Database we will create a new user and give it a password, this will be the same credentials stored within the secret so for our DataModel we will create a User called DataMode_User and give it a password. Write this information down for later use.
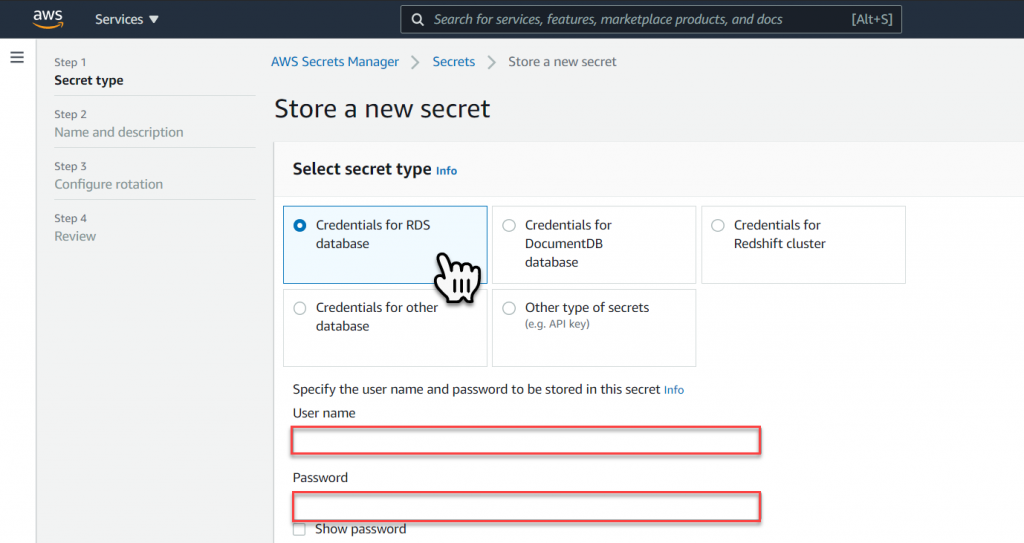
Once you ahve defined the User Name and Password (this well use when we create the Database User), we will use the Default Encryption and then select the Database Instance we want to connect to, then press Next.

Give the Secret a Name, this will be the Name that we will use within our C# code to ask the Secret Manager for the Database Connection information.

There are some optional settings but we wont need to change anything else for this example, select Next to continue.
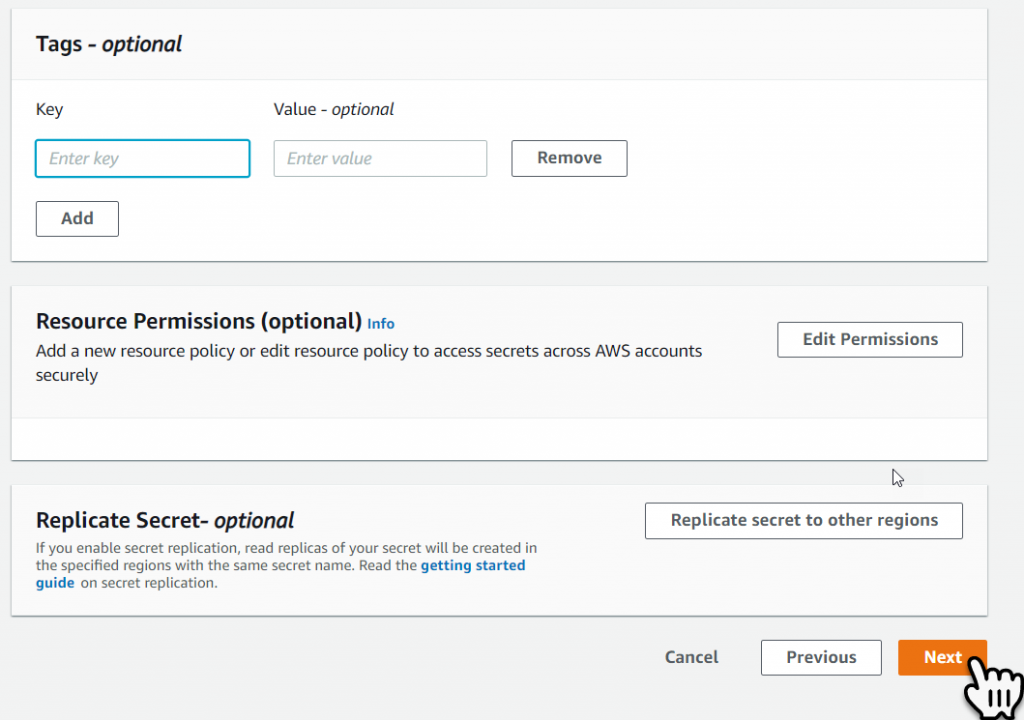
This example wont cover secret rotation, so select Next to continue.
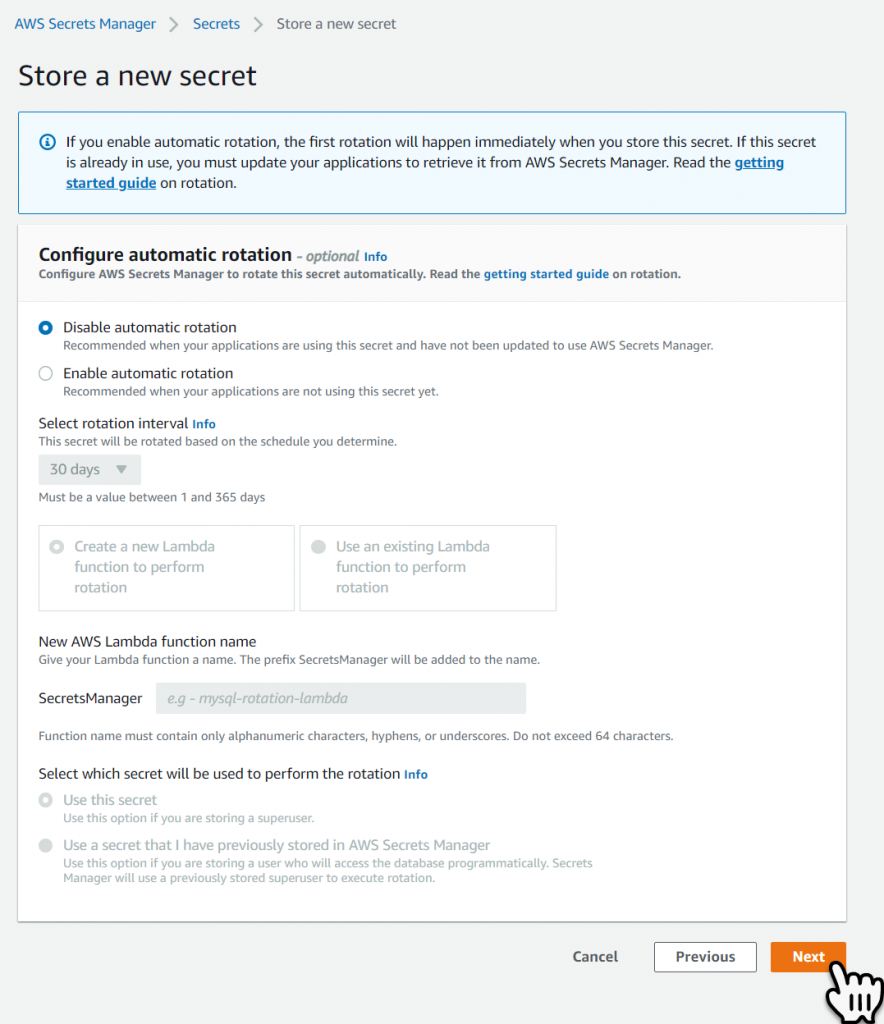
The last page is the Review and Store Secret page, at the bottom is some sample code showing you how to retrieve your secret, we are going to use Secret Caching which is simpler than this example, select Store to create the Secret.
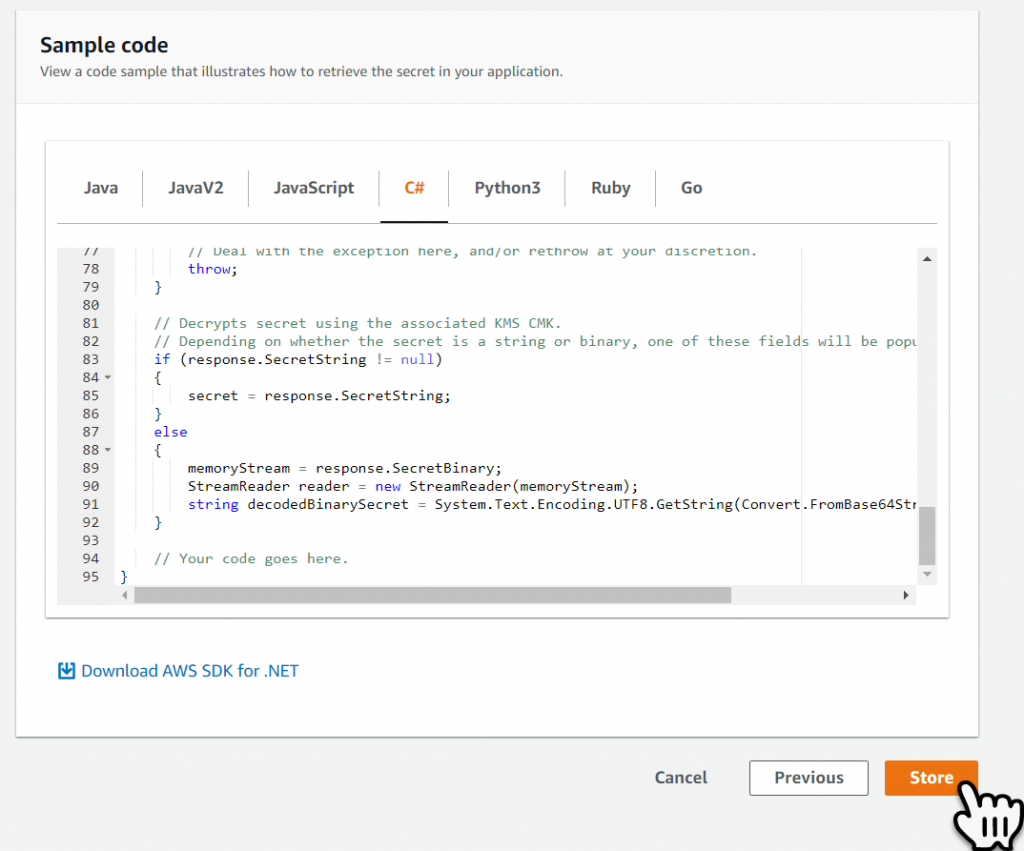
We can now see we have a stored secret.
VPC End Point
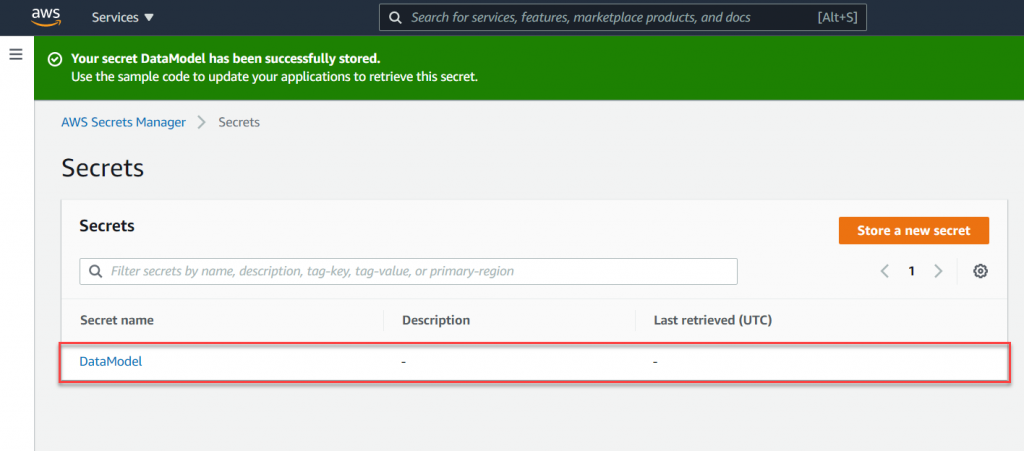
To allow our code to read the secret we have to create an VPC Endpoint for the Secrets Manager. To do this navigate to the VPC dashboard and then select Endpoints, from the left-hand menu bar.
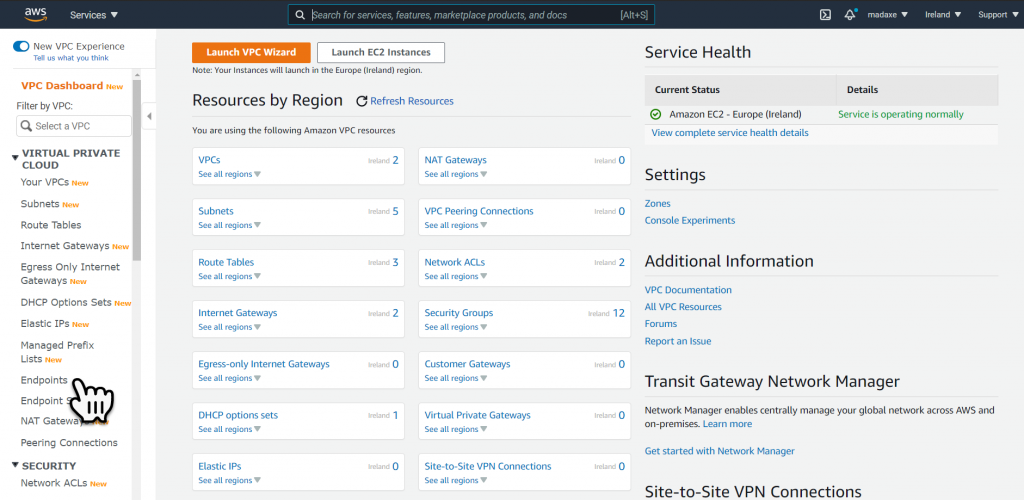
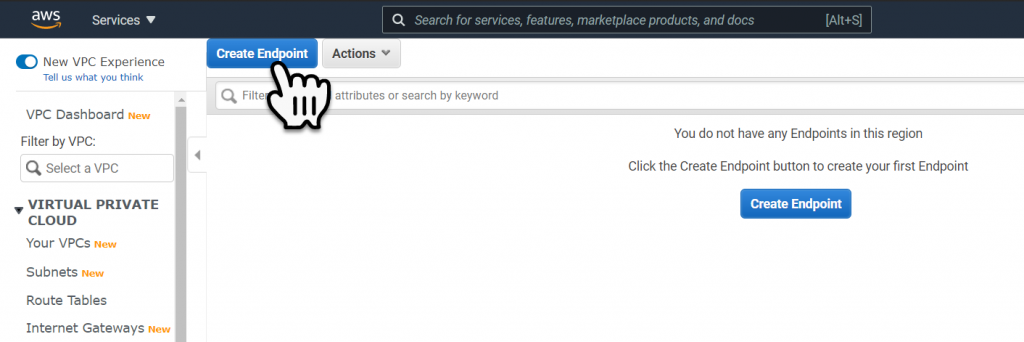
Within the Endpoint Dashboard select the Create Endpoint button.
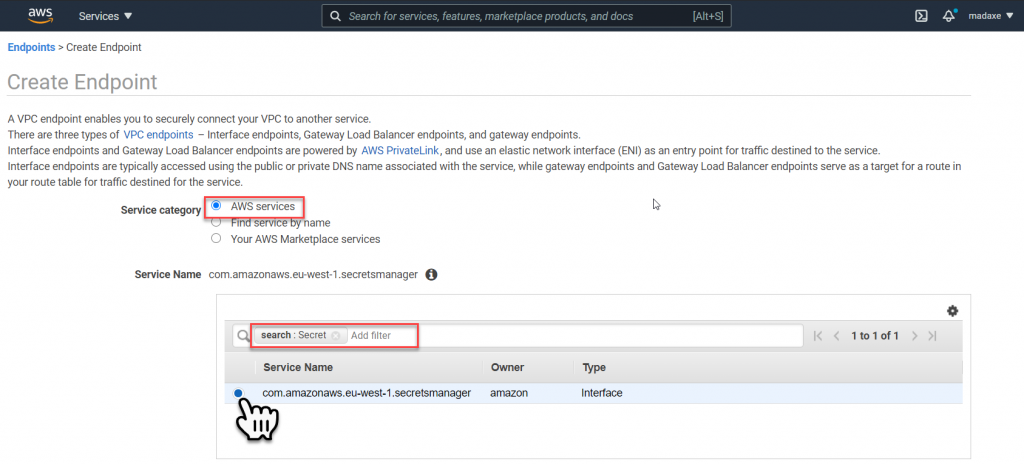
For the Endpoint definition select AWS Service, then type in ‘Secret’ into the search bar and press enter. This will filter the AWS Services list down to only services that contain the word Secret. Select the Secrets Manager service.
So we don’t have to mess with route tables, we will create the end point in the same VPC and use the same subnets as the RDS MySQL Database.
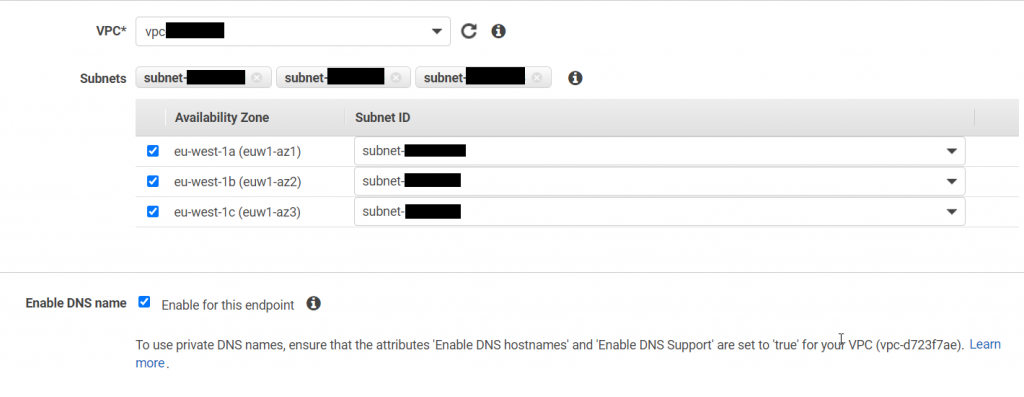
Scroll down to the bottom of the window and select Create Endpoint to complete the creation.

MySQL RDS Database User
To keep our data access secure we will create a new user in the database that has specific access, to do this within your Database Developer (I’m using Heidi SQL) go to the Manage Users and Privilege’s.
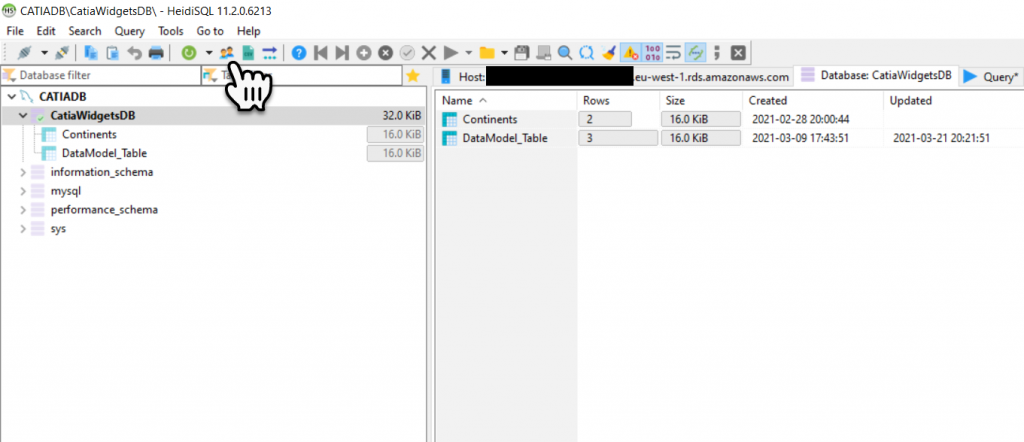
using the User Name and Password we created for the AWS Secret, create a new User and give that user privilege’s to the DataModel_Table specifically Select, Delete, Insert, and Update. Then select Save.

Secrets Manager Code
Were going to change our project so we can retrieve and display the Secret Information we saved in the Secrets Manager, then we will create a connection string to connect to the database.
Serverless Template
To publish our Lambda to the same VPC and Sub Nets as the RDS MySQL Database and the Secrets Manager End Point we need to add this information to the Serverless Template. Between the Handler and the Runtime sections add the following VPC, Security Group ID and Sub Net ID information. You can go back to the Endpoint configuration in the AWS VPC Endpoint Dashboard to retrieve the information that pertains to you.
 "Handler": "MyFirstLambdaProject::MyFirstLambdaProject.LambdaEntryPoint::FunctionHandlerAsync",
        "VpcConfig":{
            "SecurityGroupIds":["sg-xxxxxxxx"],
            "SubnetIds":["subnet-aaaaaaaa","subnet-bbbbbbbb","subnet-cccccccc"]
        },
        "Runtime": "dotnetcore3.1"
Secrets Manager Class
Lets write some code that will allow us to retrieve the secret, the first thing will be to add a Project Folder called ‘Secregts’ and a class called ‘SecrtesManager’, to our Visual Studio Project.

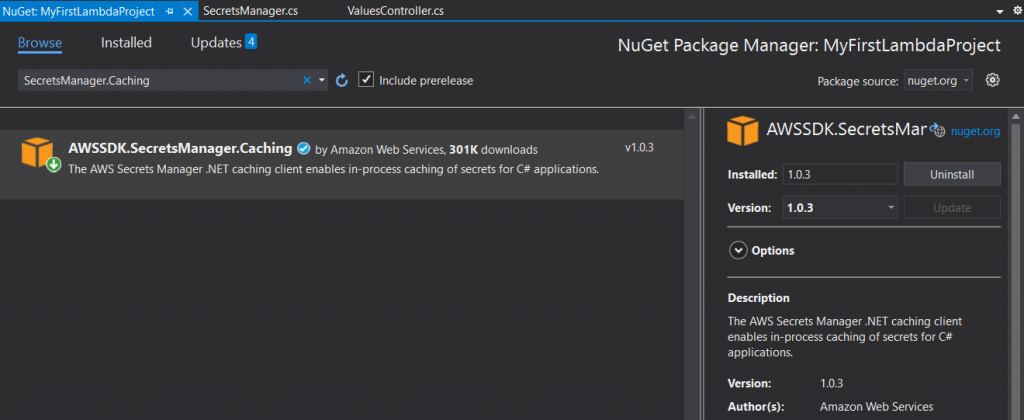
We need to add a NuGet package called ‘AWSSDK.SecretsManager.Caching’ to our project to allow us to write the Secrets manager code.
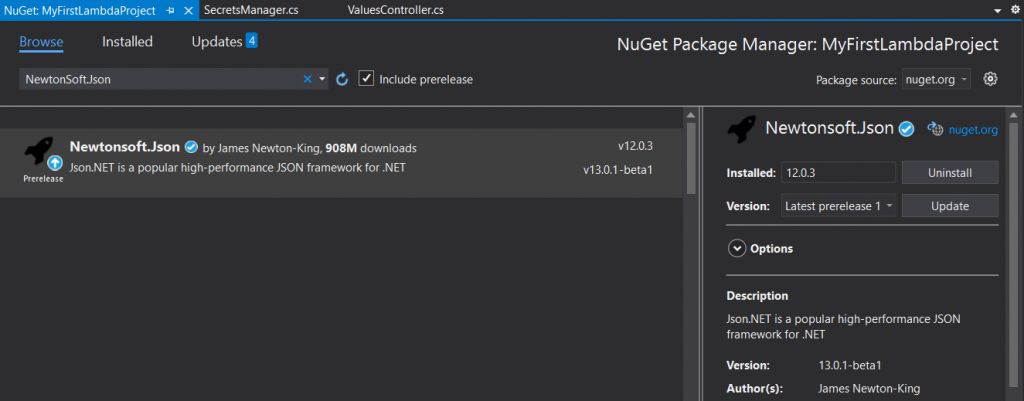
We also need to add a NuGet package called ‘Newtonsoft.Json’ to our project to allow us to Deserialize, the Secrets Manager Json string.
Within the ‘SecretsManager’ class we will add the following code.
using Amazon.SecretsManager.Extensions.Caching;
using Newtonsoft.Json;

using System.Collections.Generic;
using System.Threading.Tasks;

namespace MyFirstLambdaProject.Secrets
{
    public class SecretsManager
    {
        private static SecretsManagerCache cache = new SecretsManagerCache();

        private static async Task<string> GetSecret(string name)
        {
            return await cache.GetSecretString(name);
        }

        public static Dictionary<string, string> GetSecretFromSecretManager(string iSecretName)
        {
            string secret = GetSecret(iSecretName).Result;
            return JsonConvert.DeserializeObject<Dictionary<string, string>>(secret);
        }
    }
}
Values Controller
So to prove that we can get the secret we will temporarily modify the Values Controller ‘Get’ method, to call the ‘GetSecretFromSecretManager’ method. We will then republish the project to Lambda and use Postman to call the API end point, to print our secrets.
So lets change the Get method as shown below, we need to pass into the ‘GetSecretFromSecretManager’ method the name of the Secret which was ‘DataModel’, you may have named it differently. If you don’t remember go back to the Secrets Manager Dashboard in the AWS Console and double check.
        [HttpGet("/v1/DataModel")]
        public IActionResult Get()
        {
            try
            {
                //return Ok(this._IDataModelProcessor.GetDataModel());

                return Ok(SecretsManager.GetSecretFromSecretManager("DataModel"));
            }
            catch (Exception ex)
            {
                return BadRequest(ex.Message);
            }
        }
Adding the Secrets Manager Policy to The Lambda
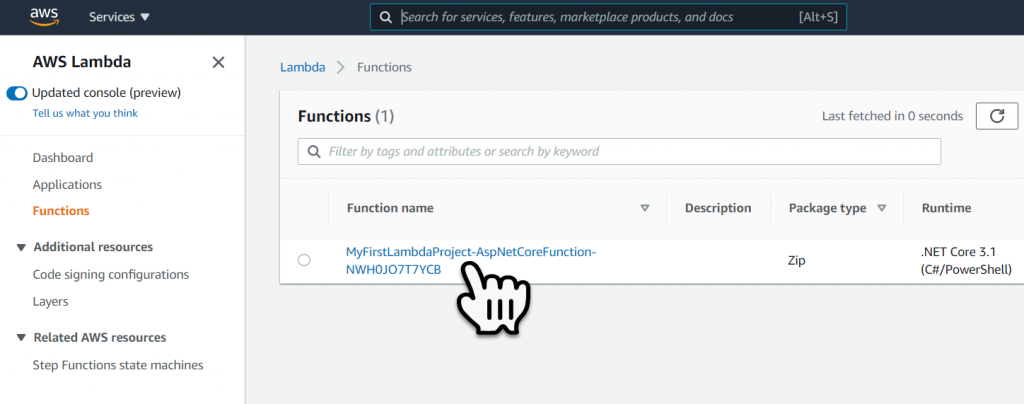
Navigate to the Lambda Dashboard inside the AWS console, and select the Lambda function.
Scroll down and select the Configuration tab.
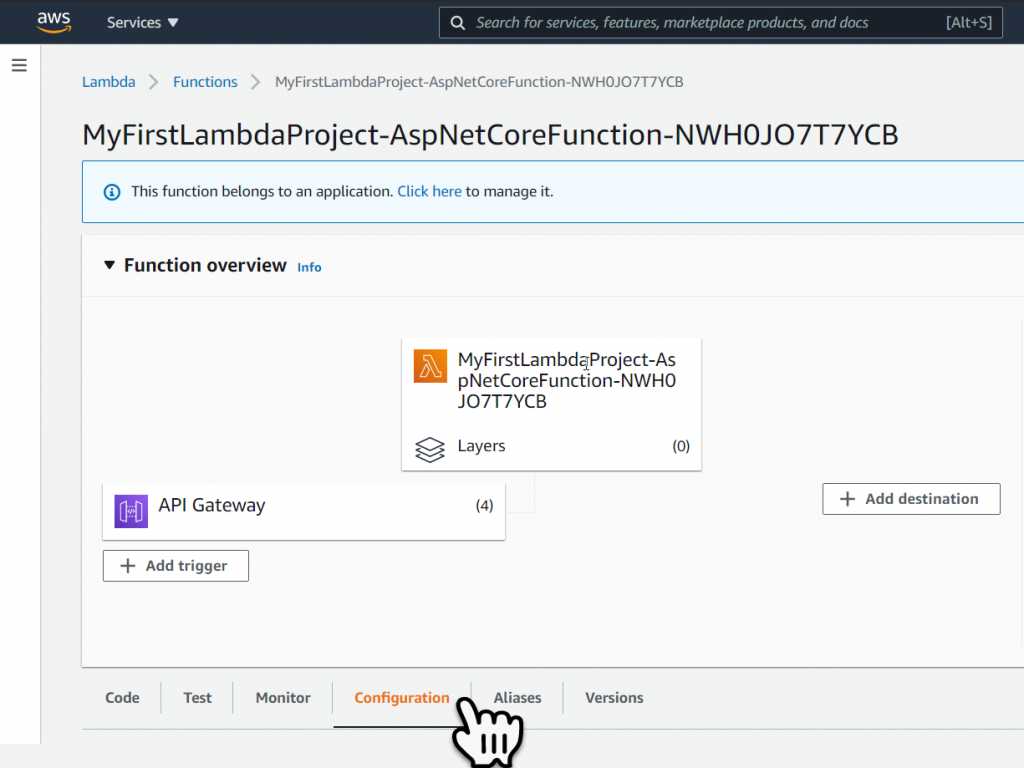
Select the link to the Execution Role.

To allow the Lambda function the capability to read the Secret we must add the policy ‘SecretsManagerReadWrite‘.

To do this select the Attach Policies button, then key into the text filter ‘secret’ and press enter. Then check the policy to add and select Attach Policy. With this policy attached the lambda function will be able to read our secret.

Testing With Postman
The first thing we must do is republish the project to Lambda, to do this right mouse click on the project and select Publish to AWS Lambda from the contextual menu.

Once the publish is complete, copy the AWS Serverless END point URL.

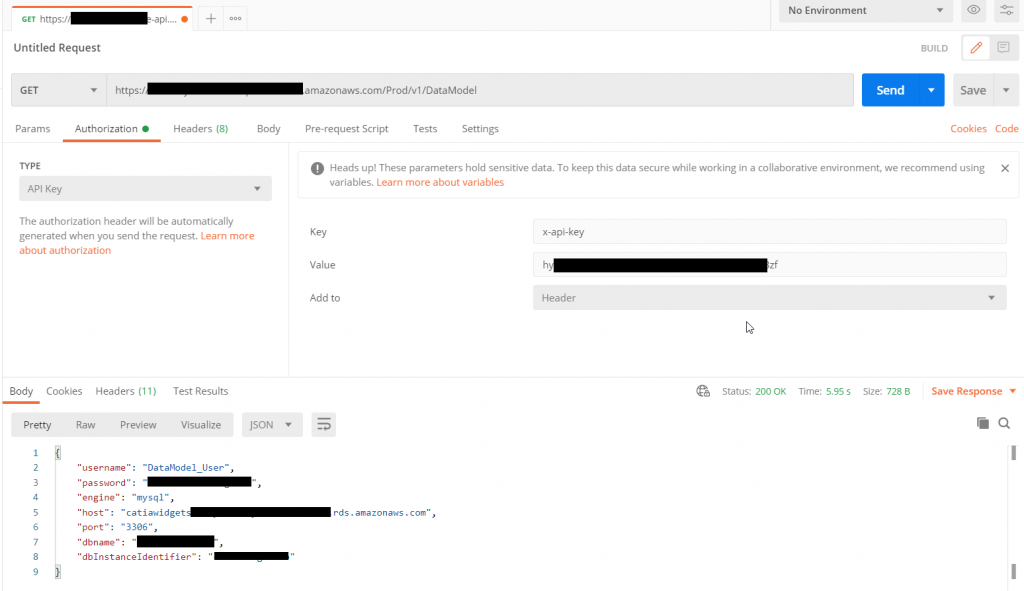
Open postman and paste the AWS Serverless END point URL into a new Tab and set the Request Type to Get. Then add the endpoint URL and select the Send button.
You should get a response which will show you the secrets stored in the secrets manager.
Obviously this is a security breach, so I would recommend that you revert the Get method back to the original code and republish to Lambda, however we are going to secure our end point using an API key. Later on we will revert the code back.

Adding API Key’s
If anybody was able to get your AWS Serverless URL, and End Point URL they could run thousands of requests and create a sizable bill. So let’s make sure that does not happen.
So lets first login to the AWS Console and Navigate to the API Gateway dashboard, then select the API Endpoint for our project.

So we can now see the individual end points, that were created by the Serverless Template. We now need to create a usage plan, API Key and apply it to each of the end points. To do this select the Usage Plans link in the left-hand menu bar.
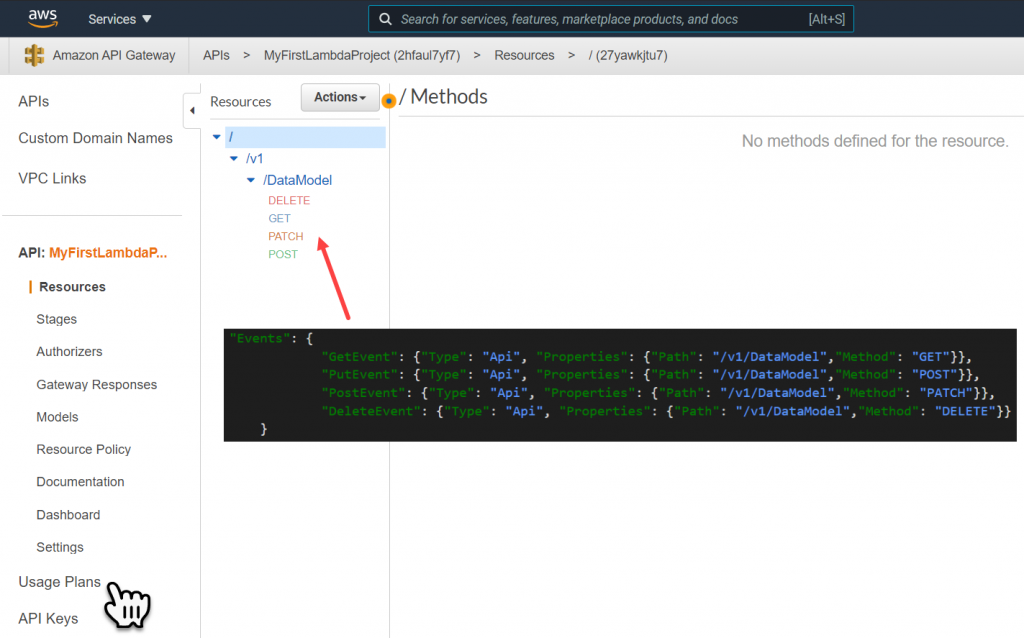
Then select the Create button.

Since this is for testing and learning purposes, lets keep the Throttling and Quota numbers low. For a real production deployment you will want to think about these values, since if you exceed Quota then the Lambda will become inaccessible. Then select Next.
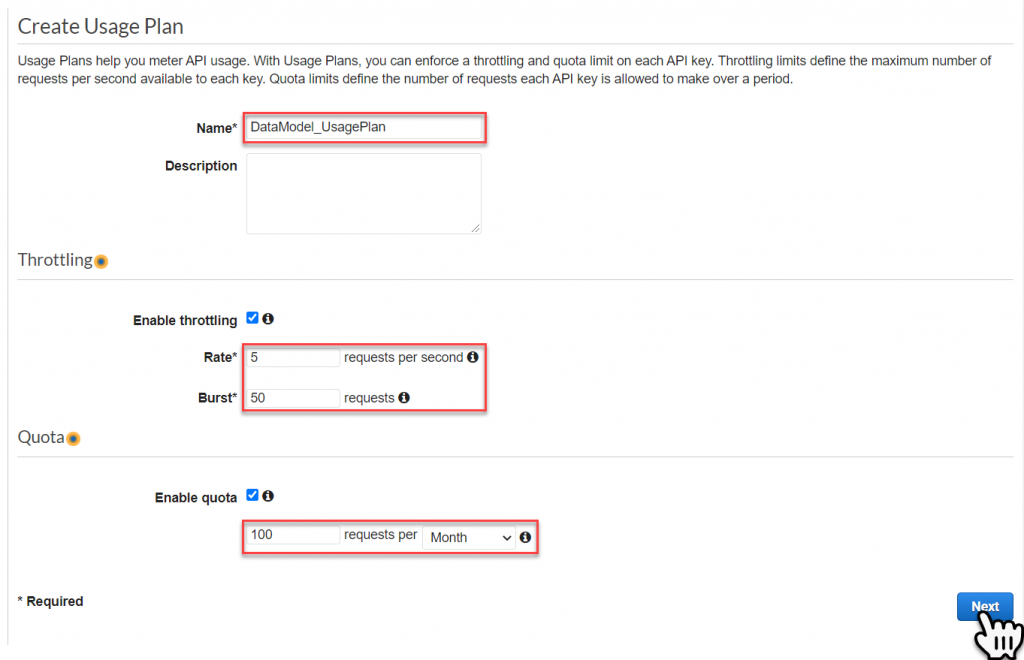
Next we will add an API Stage, to do this select Add API Stage, choose the API then the Stage. Then Select the Checkmark to apply the ‘Method Throttling’ and select Next.

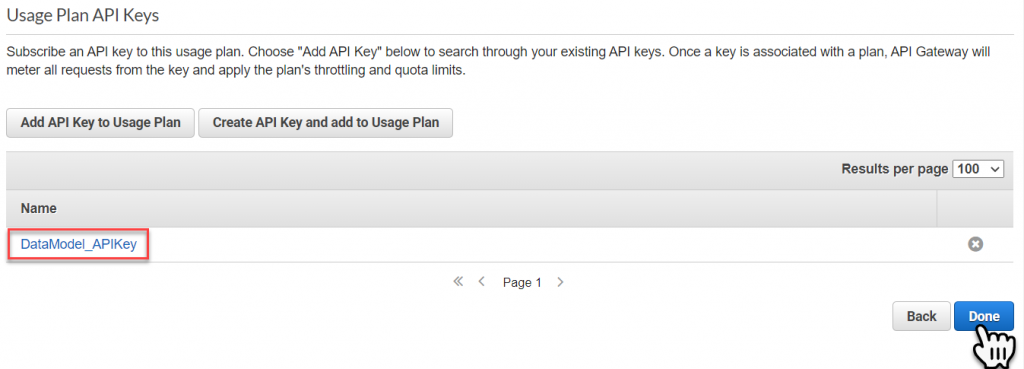
In the next section select Create API Key and add to Usage Plan, you can always use an existing API also.

In the popup window, key in a ‘Name’ for the API key and select Save.

We now have a competed Usage Plan, select Done to finish the definition.
Next for Each API End Point we have to enable the usage of the API key. To do this return back to the API Gateway dashboard, then select the API Endpoint for our project. Then select one of the end points and select the Method Request link.
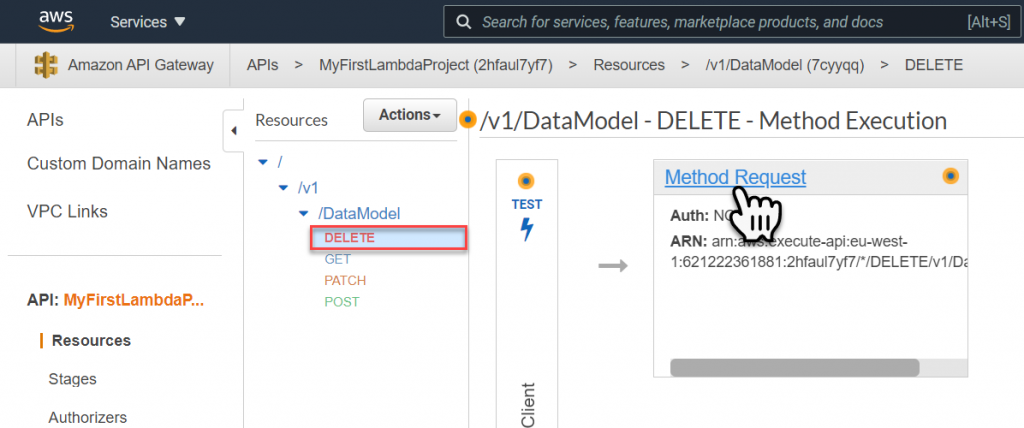
In the method Request Settings, change the API Key Required value from False to True and select the Checkmark to approve the change.
Repeat this for all the API end points.

Next we must Deploy the API Endpoint. To do this select one of the API endpoint’s and from the Actions dropdown menu select Deploy API

In the popup window select the Deployment Stage and then select Done.
Repeat this for all the API end points.

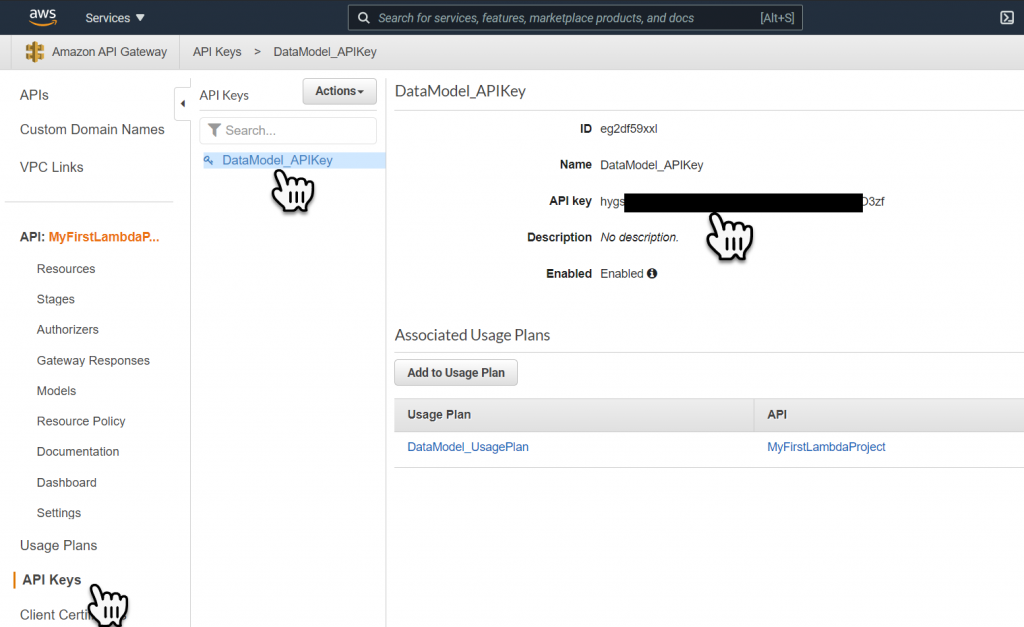
Now we need to know what the API key is so we can test if the end point is protected or not. To get the API key, select API keys from the left-hand side bar menu, then select the new API Key and in the information panel select Show API Key. Now you can copy the API key.
Re-Testing With Postman
Let’s go back to Postman and rerun the Get Request, we should now get a Forbidden message in the response. This is because we must send the API Key in the request header.

To add the API key in the request header, select on the Authorizations tab and change the Type to ‘API Key’. The Key parameter must be named ‘x-api-key’ for the value paste in the copied API Key. We can re test by selecting Send, we should again get back the secret information again.
We are now secure.
